

Unpacking and Assembling Your New scheel-mann Seats

Link To The General Seat Operation Manual
PDF of the general seat operation manual-Note: does not contain model-specific install instructionsGeneral Installation Tips
Read Through These Instructions Completely
Please read through this section completely before starting work. Doing so will help you understand all the steps involved. Then come back to the beginning and proceed one step at a time as you install your new seats.
Do Not Dispose of Packaging Until Install is Complete
There are small parts enclosed in with your seats. To make sure none of the essential parts get misplaced, do not recycle or toss the boxes, bags, and cardboard until after your install is complete.
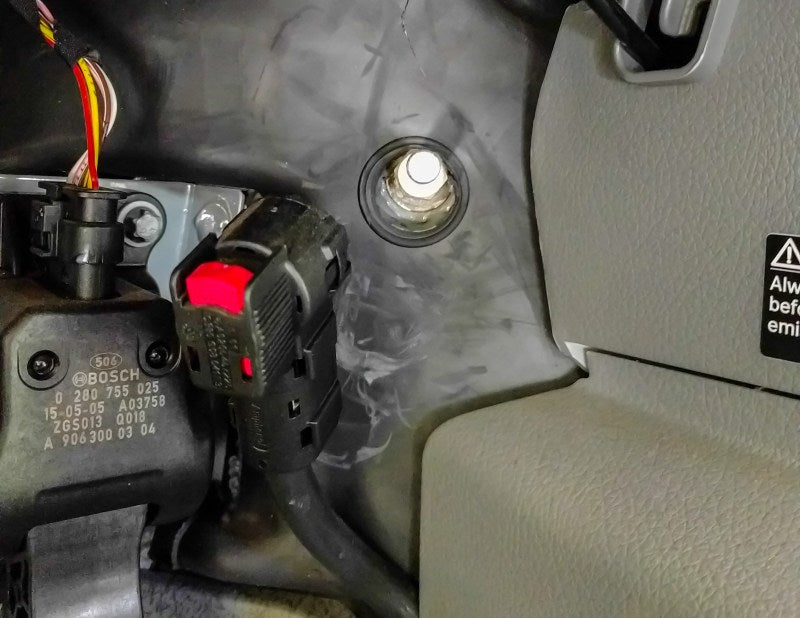
First: Disconnect The Ground Cable
Disconnect the ground cable from the battery. On a Sprinter, there is a convenient quick disconnect under the dashboard on the left side of the center console.
Tools You Will Need
All tools need to be high quality. Do not use a tool that does not fit inside the fastener precisely.
- Large flat blade screw driver
- Small hammer
- 5mm Allen wrench
- 6mm Allen wrench
- 13mm End Wrench
- Sockets and/or end wrenches for stock seat bolts-size may vary with vehicle application-For Sprinter you will need E14 female torx socket, T40 male torx, T50 male torx, 15mm End Wrench
- Razor blade or X-Acto knife if installing armrests
In addition, you will need general wiring tools like a wire striper, crimper, ring terminals and butt connectors for hooking up the seat heaters.
General Guidelines
- Start threading fasteners gently until you are sure they are going easily and smoothly. Avoid powerful tools or using full strength when first starting bolts.
- Make sure your tool is fully engaged on the fastener before applying pressure.
- On any given step, start by installing all the fasteners most of the way, but don't fully tighten until they are all installed. This approach makes sure all parts are lined up, and allows you to adjust the alignment of parts as you go if needed. Fully tighten before moving on to the next step.
- Use the high-quality hardware provided in your kit.
Tips for Mounting Bracket System
On vehicle applications with anchors and/or spacers, the seatbelt anchors are mounted in-between the seat and sliding rails

Note
Anchors/spacers vary by application. If your adapter bracket kit includes anchors and/or spacers, they will be individually labeled for location, and they will be installed between the seat and sliding rails. Depending on your application, you may have two individual anchors shaped like a hockey stick, or one anchor and one flat spacer, or one anchor shaped like the letter U. The important part is that the anchors and/or spacers mount between the seat and the sliding rails. The tab on anchors shaped like a hockey stick point down. The tabs on anchors shaped like a U point up. If your kit doesn't include anchors and/or spacers, you can skip ahead to Tips on installing the sliding rails.
Spacers and seat belt anchors
Your anchors and/or spacers have a label specific to your application noting which side of the vehicle and seat for correct mounting, i.e. Door Side or Inboard, and Driver Side or Passenger Side. For applications without a swivel: The seat belt receptacle anchors mount on the both sides of the seat. The seatbelt anchors sandwiched in between the seat, and the seat slider, and point down. For applications with swivels: The seat belt receptacle anchors mount on the inside of each seat, and the spacer is mounted on the outside of each seat. The anchor and spacer are sandwiched in between the seat, and the seat slider.
Anchors mount between the bottom of the seat and the sliding rails, and point down as shown
There are new bolts included to mount the seat belt component to this new anchor.
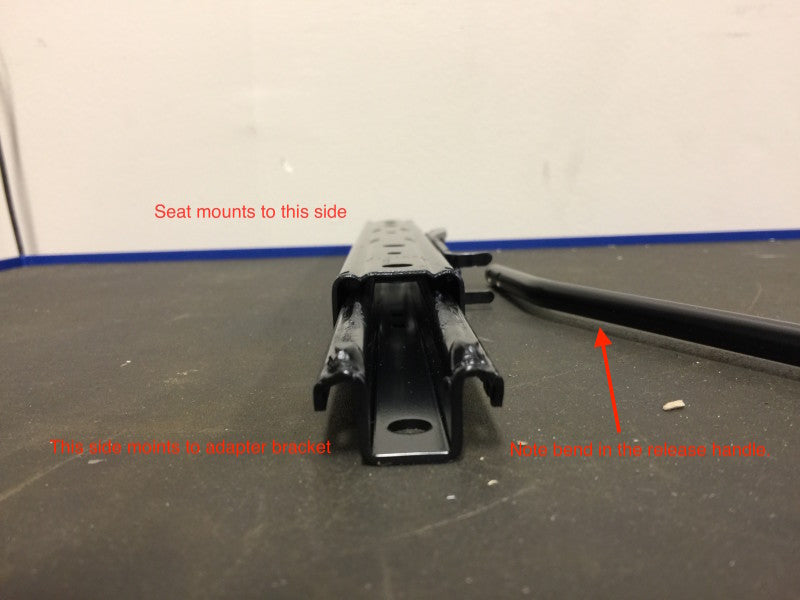
Tips on installing the sliding rails onto the seat
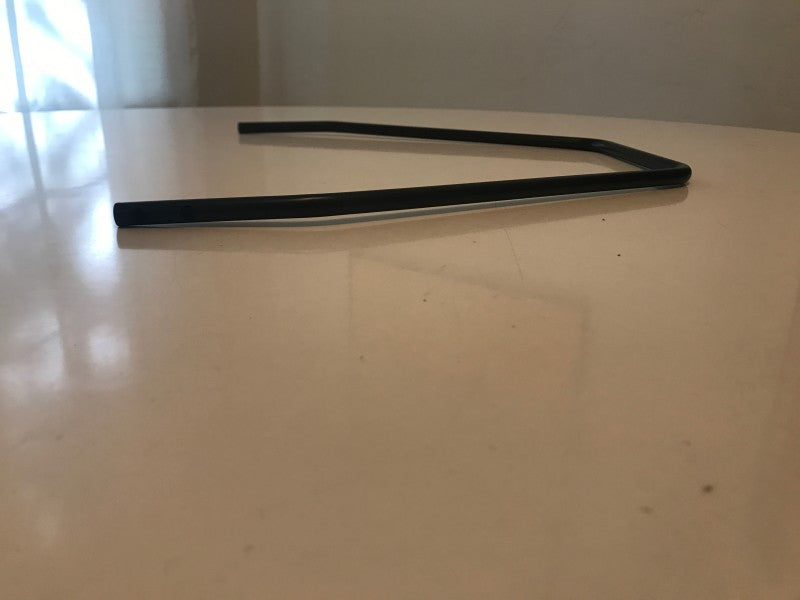
Note that the release handle has a slight bend in it. If you lay it on a flat surface, you will see light under one side like in this picture. You want the bend to go away from the seat.
One more picture of the correct orientation of the release handle
Note the slight bend
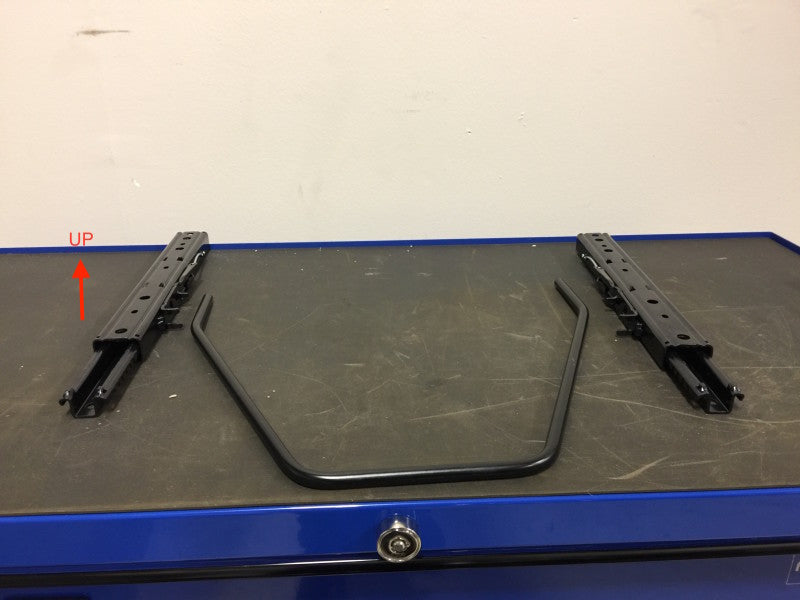
Both rails and release handle laid out in the correct orientation
Mount both rails to the seat
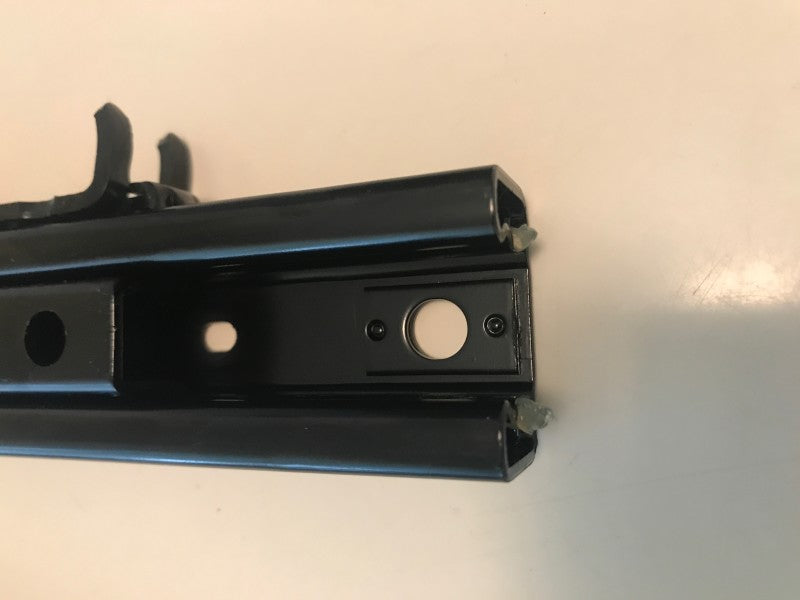
Use the socket headed bolts and lock washers that are supplied with the seat. The correct holes are reinforced with a second layer of steel as shown in the picture. (Note: there are three mounting holes on each rail and the hole in the middle does not have an extra layer of steel).
Start by bolting in the rear mounting hole
Get the rear mounting bolt started, and tighten it most of the way. You want to leave it slightly loose for now so that you can get the front mounting bolt started.
Slide the rail back to reach the front mounting holes
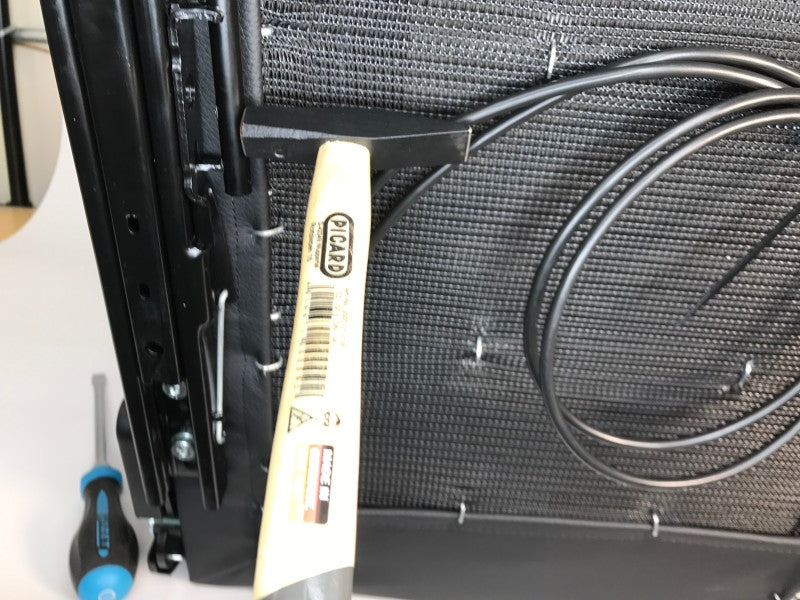
To release the slide mechanism to access the bolt holes, you can gently slip a wide screw driver in between the seat and the release tab. Once you have slipped the screw driver in, twist it to release the slide so you can access the front mounting hole. Install the front bolt, and tighten it fully. Once the front bolt is tight, move the slide forward and install the last bolt in the rear, and tighten both rear bolts fully. Tighten all 6 bolts to 25 NM
Once the rails are bolted to the seat, you can install the release handle.
The release lever can be bowed slightly and put into position. There are two mounting holes to choose from in the release handle. You can use either set of holes, one set will just allow the handle to extend farther out under your legs. Line up the desired hole on the single tab sticking out of the slide on one side. Once it is in position, a tap from a soft mallet or a small hammer to set it into the sliders fully.
Tap the release handle until it is seated in the groove

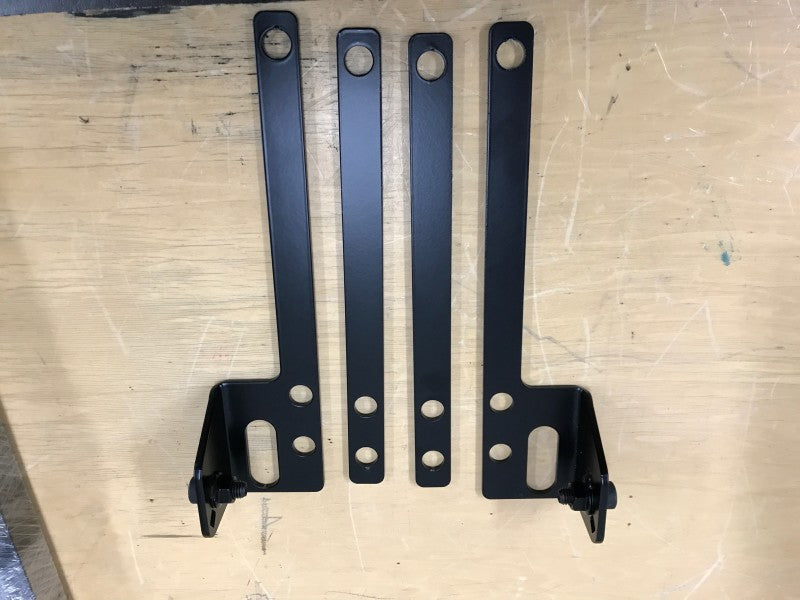
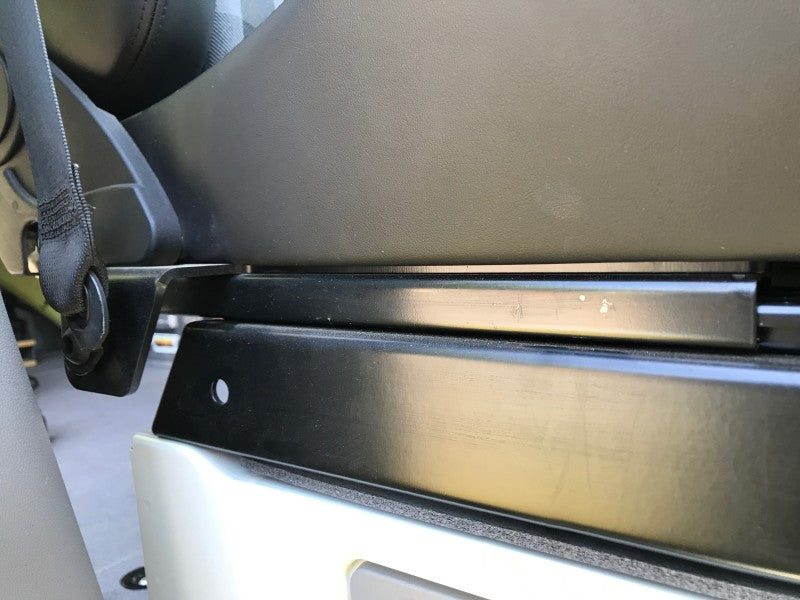
Mount the adapter brackets to the sliding rails.
Use the supplied hardware to attach the adapter bracket to the sliding rails. On vans, these are a pair of riser brackets and should be mounted to the sliding rails before moving the seat into the vehicle. Use the factory bolts to attach the risers to the seat base. For most cars and trucks, the adapter bracket is a large plate with feet at the corners, and it is easier to install the adapter bracket in the vehicle, then move the seat plus sliding rails into position in the vehicle. Use the factory bolts to attach the adapter bracket to the floor of the vehicle. For all applications, leave the bolts loose until all four are started. Once all four bolts are started, tighten everything down. Bolt up the seat belt to the seat using the supplied bolts.
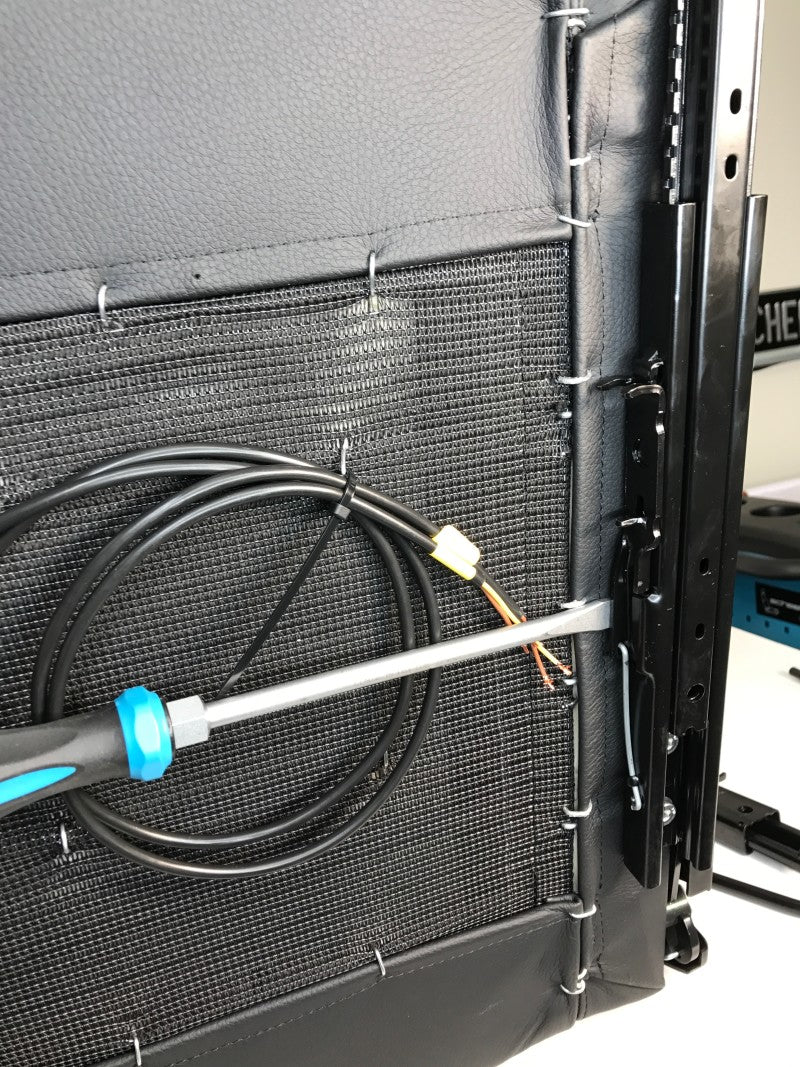
Tips On Wiring
Tips on wiring the seat heat on the Sprinter with factory seat heating
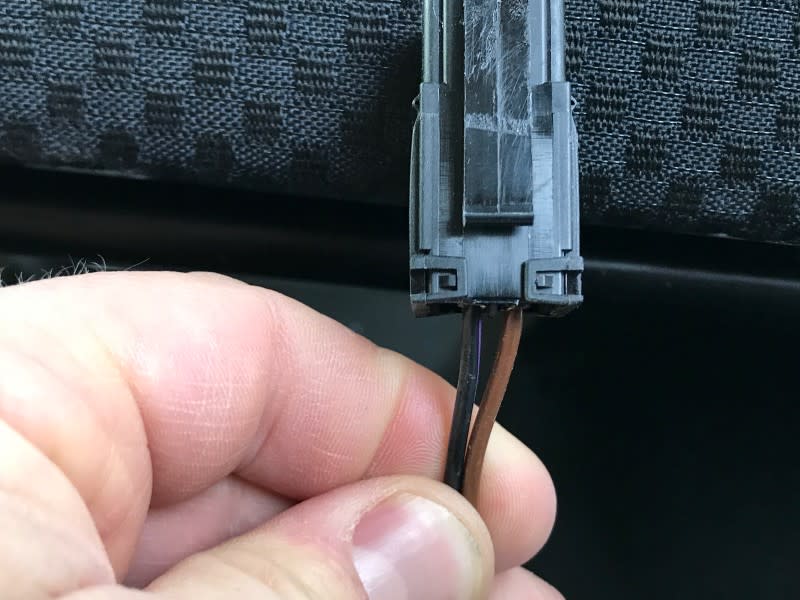
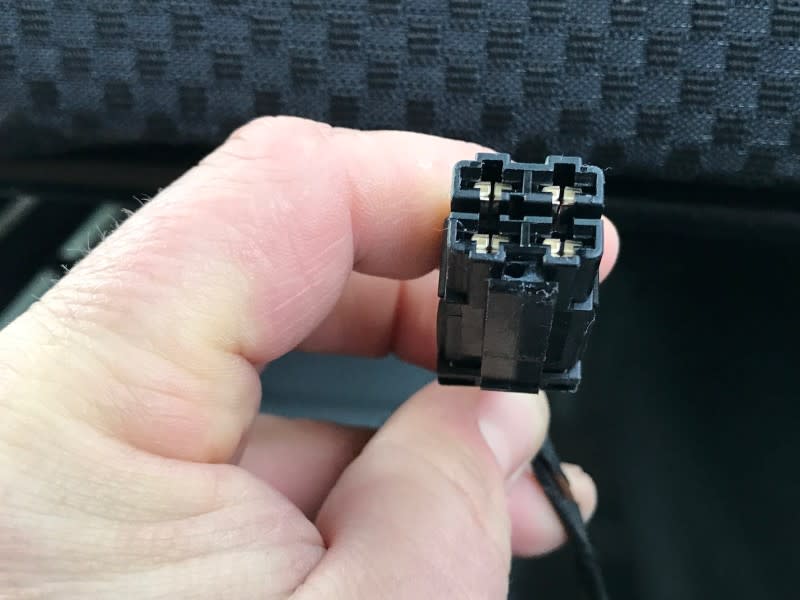
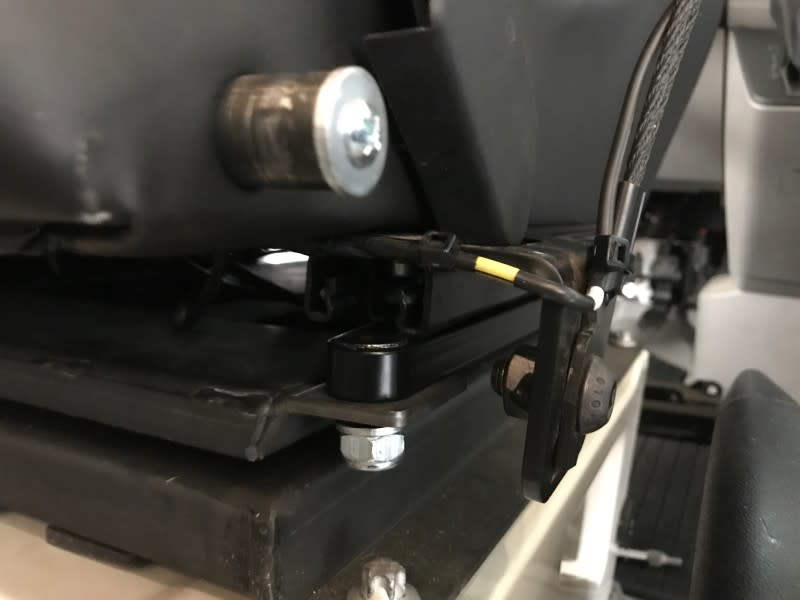
The seat heating harness in the van has two wires, and is split to 4 female spade connectors. Brown is ground, and the black with purple tracer is hot. Our wire harness has a solid red hot wire, and a ground wire that is Red, with a yellow tracer.
Another view of the Sprinter seat heating connector
Wire Length and Strain Relief: avoiding damage to the wiring
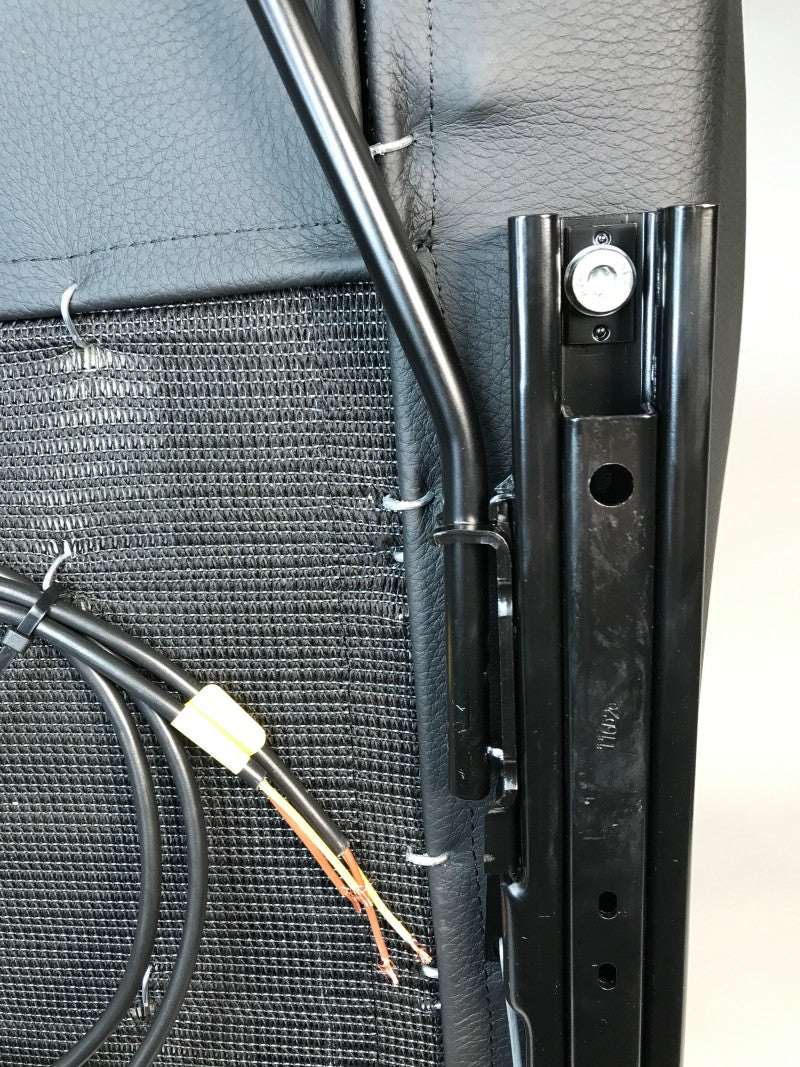
NOTE: There is a seat belt sensor wire on the drivers side seat. With both seat belt sensor wiring, and heat wiring, leave everything loose and long, and watch carefully as you gently slide the seat back and forth (and swivel if applicable) to ensure that any wiring running from the seat to the seat mount or the floor is long enough to allow the full range of adjustment. Once you are sure the length is adequate, use zip ties to carefully support this wire high enough that it does not get caught on the sliding rails as the seat is slid back and forth.
For seats with heat and Klima seats, the red wire on the included harness should be connected to a 12-volt power source. Switched power is recommended so that you don't drain your battery if you accidentally leave the seat heater on.
Make sure your power source is on a circuit capable of handling the draw. 10 amps or more for one seat, 20 amps or more if wiring both front seats together. There are a bunch of different ways to connect to power, such as connecting to a fuse panel with a fuse tap, connecting to a terminal block/bus bar (if you have one), souring an automotive relay and triggering the relay with a switched power circuit, but drawing directly from the battery, and so on.
The black wire with a ring terminal should have a clean and solid connection to ground.
For seats with just seat heat (no ventilation) there is a blue connector that is not used. You don't need to do anything with this connector.
Tips On Mounting The Arm Rest
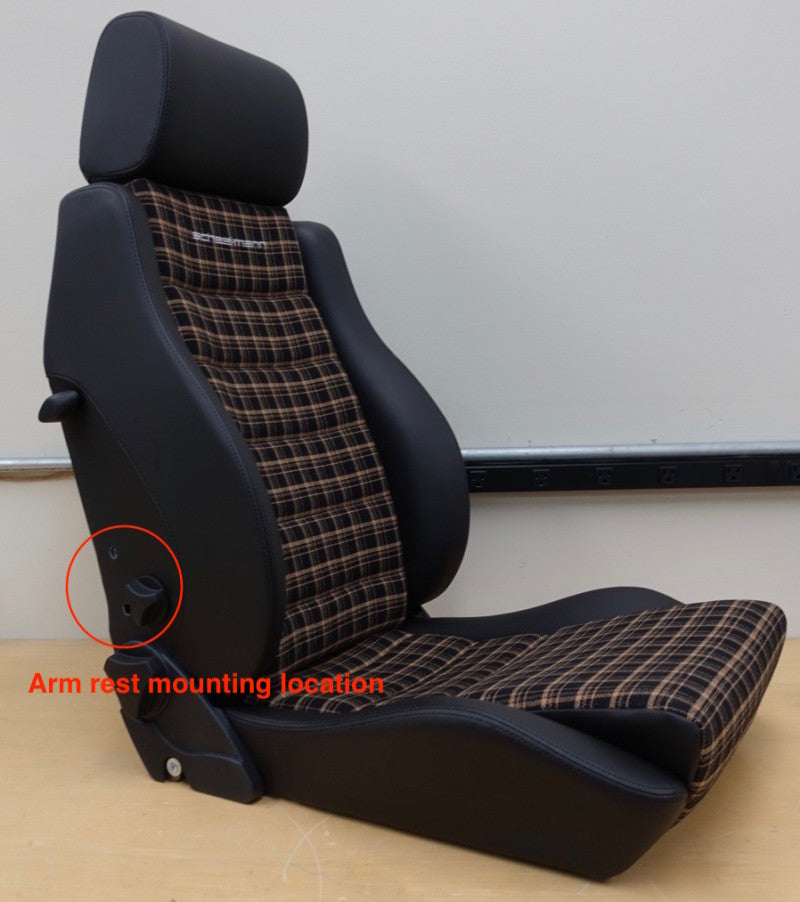
Locating the Mounting Location
On the Sprinter, the arm rest fits on the inside of each seat. If the seat was special ordered with an arm rest, the factory will cut holes in the fabric where the mounting bolts are located. As circled in red here. Note that you will be using the new short bolts supplied with the arm rest. The long bolts are for seats that have an integrated seatbelt.
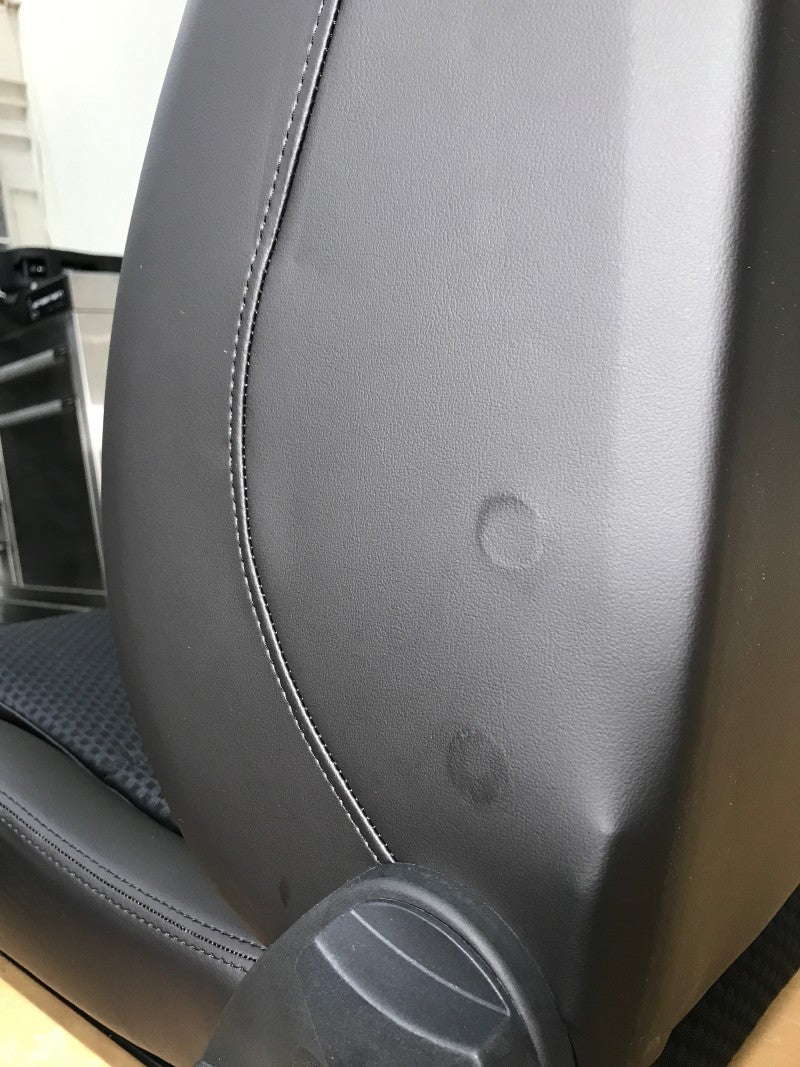
Locating the mounting holes if the seat does not come with precut holes.
If you feel behind the material on the side of the seat, you will feel two bolts. The location is highlighted here.
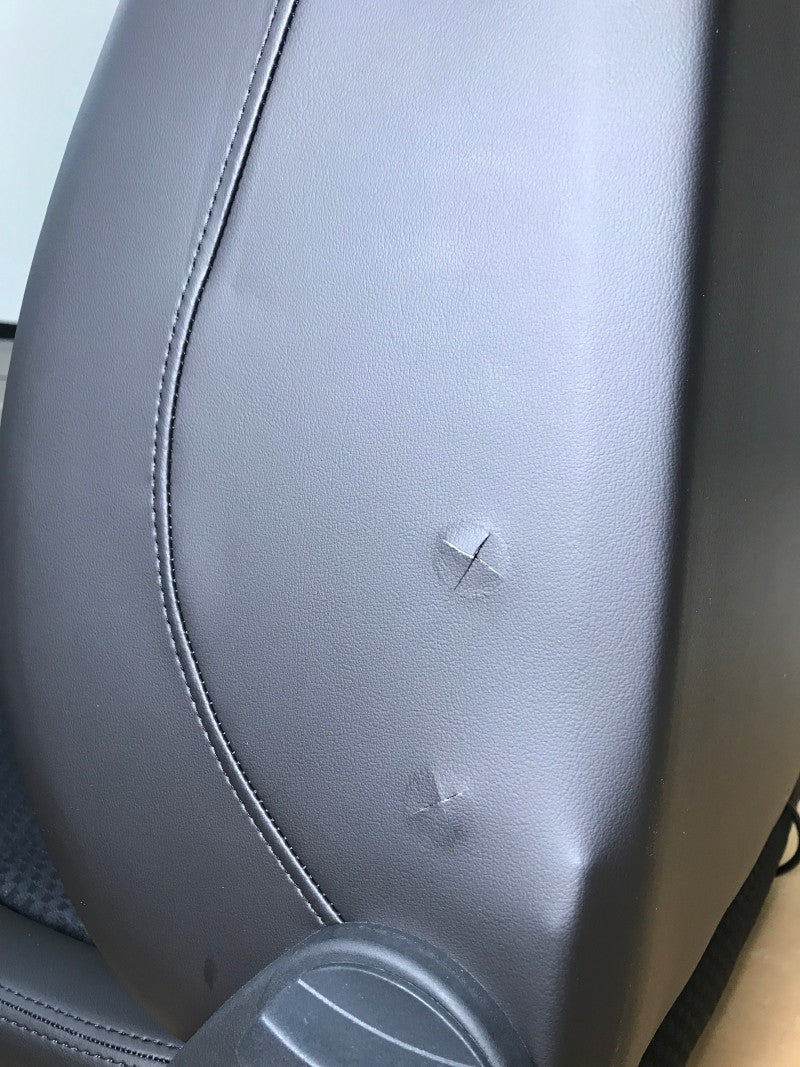
Make an small cross hatch incision to access the bolts.

Snip off the tabs so that you have access to the bolts
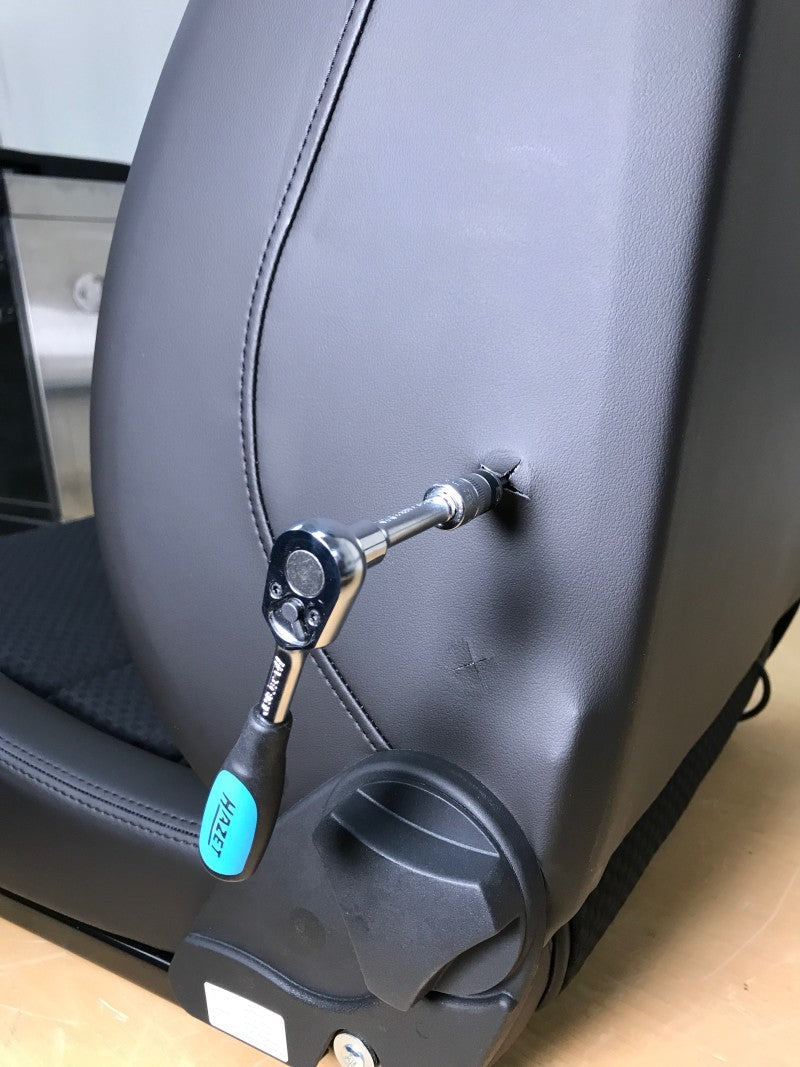
Use an allen wrench to remove just the upper bolt
To mount the arm rest, first find the included black oxide coated countersunk bolts. These new bolts will be used to install the arm rest.

Install the arm rest, one bolt at a time.
Once the original upper bolt is removed, offer up the arm rest and using the new black bolt, start threading it in to the seat. Once the upper bolt is started, you can remove the original lower bolt, and start treading in the new black bolt. These bolts hold the seat back to the reclining mechanism. Do not take both bolts out at the same time. If the new bolt does not start to thread in easily, look inside the bolt hole to make sure that everything is lined up properly. Once both bolts are started in the hole, tighten them both.
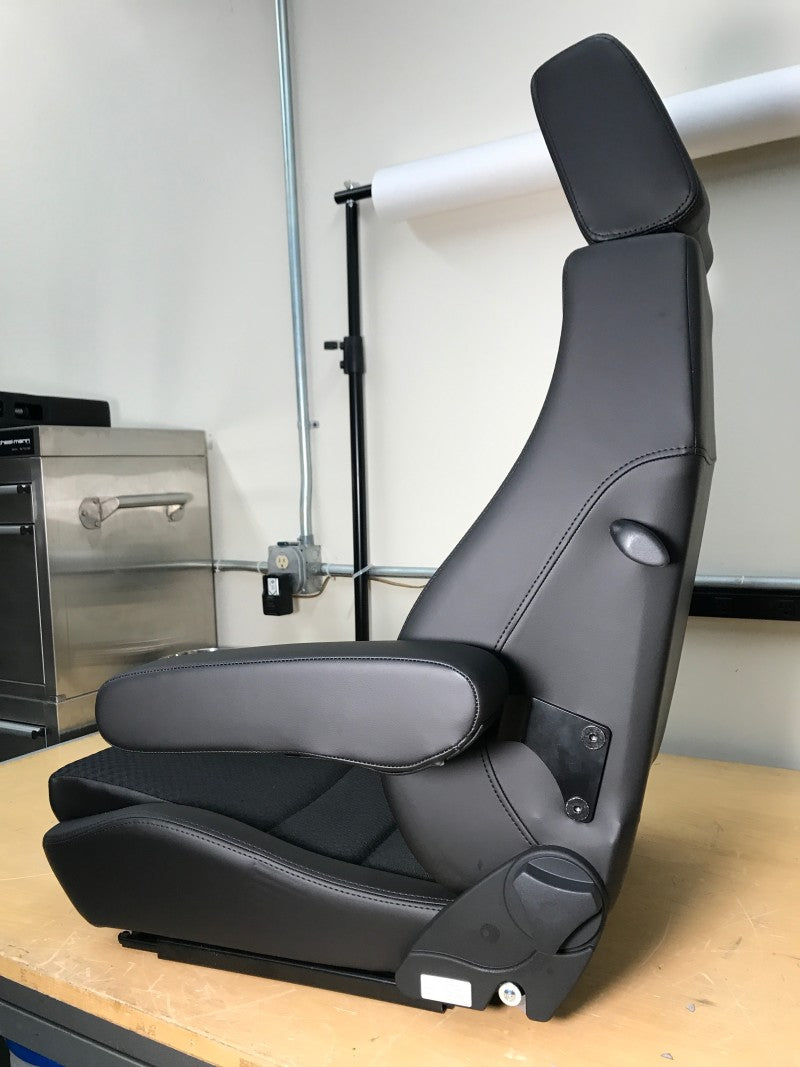
Seat with arm rest installed
Make sure that both bolts are tight.